Pollen Under The Microscope
Methods, Techniques and Observations
What is Pollen?
Pollen is
a small grain that consists of a few cells. To the naked eye it appears as
a yellowish (pale yellow) dust-like substance that is either dispersed by wind
or insects.
Pollen is formed within the sacs (or microsporangia) in the anthers that are located in plant flowers. The development of plant anthers also involves the growth and differentiation of tissue that develop to produce the pollen sacs. This is then followed by a process of cell division (meiosis) that results in the formation of clusters referred to as quartets within the pollen sac chambers.
The quartet then undergoes further divisions to produce pollen, which serves as the male gametophyte of plants (seed plants) for reproduction. Depending on the type of plant, pollen is either dispersed by wind or insect to the receptive stigma.
* A plant that is pollinated through wind is referred to as anemophilous while those by insects are known as entimophilous.
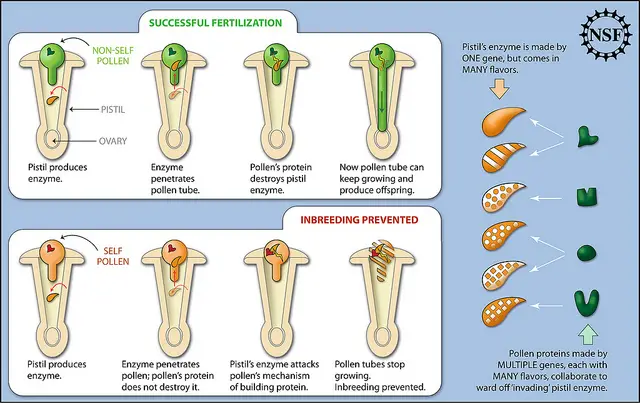
* Once a pollen grain falls on the receptive stigma, it starts absorbing water and becomes activated. This causes the gametophyte in the grain to develop a tube reaching the ovule of the flower, which in turn allows male gamete cells to be transported to the ovule for fertilization.
Pollen Microscopy
Sample Collection
Requirements
- Needle (or wire loop)
- Pipette tips
- Tweezers
Procedure
- Collect healthy anthers from flowers (this may involve inspecting a number of flowers to find healthy anthers with high pollen content)
- Using the needle or laboratory wire loop, carefully and gently try scraping the pollen from the anthers and store them in the pipette tip or a micro-tube.
* If the pollen is not to be used immediately, it should dried and stored frozen.
Under Stereo Microscope
Requirements
- A stereo microscope
- 50 percent glycerine
- Microscope slide
- Alcohol
Procedure
When viewing pollen grains under stereo microscope, it is advisable to view treated pollen (washed using a little alcohol) and untreated grains separately in order to see the difference.
The procedure involves the following simple steps:
- Wash the pollen grains using alcohol and place the sample on a microscope slide (also keep an unwashed sample)
- Add 50 percent glycerine to the sample and place under the stereo microscope for viewing
Students may also place a healthy plant anther with pollen (without treating it with alcohol or adding glycerine) on the stage of the stereo microscope and try observing how it appears
* Pollen grains have an oily surface that can be easily removed using alcohol. Therefore, alcohol may be used to remove the oily layer and thus get a better look at the grain surface. Fifty percent glycerine is used for the purposes of hydrating the grains and making them swell for good viewing.
When viewed under the stereo microscope, pollen grains will appear as grossly shaped, irregular structures/particles. However, the shape and appearance of the grains will vary depending on the type of pollen under investigation. For untreated grains, there is poor contrast compared to treated pollen grains.
Under Compound Microscope
Glycerol Jelly Method
The glycerol jelly technique is one of the most common mounting techniques used for pollen. It involves using glycerol jelly, which consists of 10 grams of gelatin, 35ml of distilled water as well as 30 ml of glycerol.
For best possible results, students are advised to use freshly collected pollen.
Requirements
- Freshly collected pollen sample
- A compound microscope
- Glycerine jelly
- Warm water
- IPA solution (Isopropyl alcohol solution)
- Glass slide
- Microscope cover slips
- Distilled water
Procedure
- Place a small amount of the sample (pollen) into a small dish and add a few drops of IPA solution for about 10 minutes (isopropyl alcohol will remove the oily layer from the surface of the grains. If the pollen had not been removed from the anthers, the solution also helps isolate them from the panther to only retain the pollen grains)
- Using warm water, melt the glycerine and allow it to remain warm
- Obtain 1 or 2 drops of IPA and pollen mixture using a dropper and place at the center of a clean glass slide (prepare two slides)
- Place the slide on a hotplate for about 2 minutes to dry
- Add one drop of the glycerine jelly on to a microscope cover slip and lower the cover slip gently at an angle on to one of the prepared slides to remove air bubbles and bring the jelly into contact with the pollen
- Allow the slide (with jelly) to stand for about 5 minutes on a hotplate - This allows the glycerine to penetrate the pollen grains.
- Place the slide in a cool area until the jelly sets (for this technique, a small amount of nail polish can be added to seal the sides allowing the preparation to be stored and used for several months)
- View the two slides under the microscope
Observation
When viewed under the microscope, the stained slide is clearer because of better contrast. The grains will appear as tiny ovoid particles with what seems like a scaly surface or ornamentations.
The unstained slide appears more transparent /translucent and does not give a clear view of the grain surface. However, the appearance of the grains is also largely dependent on the type of plant from which the pollen was obtained.
Wet Mount Technique
Requirements
- Glycerol
- Glass slide
- Cover slip
- Dropper
Procedure
- Add two drops of glycerol on to a clean slide
- Add a small sample of the pollen (this can also be done by tapping the anther to obtain the pollen)
- Gently place the cover slip on the to sample at an angle to remove air bubbles
- Nail polish can be used on the sides for the purposes of sealing
- Place the slide on the microscope for viewing
* For this technique, toluidine blue or acetocarmine may be used for staining the sample for clarity.
Dry Mounting Technique
This is the simplest method that involves the following simple steps:
- Place the sample on to the microscope glass slide
- Cover the pollen sample with a cover slip
- View under the microscope
Viewing Pollen Tubes under Microscope
Pollen tubes are important structures that grow down the style allowing for gametes to the transported to the ovary for fertilization. To view pollen tubes under the microscope, Farmer's solution and sodium hydroxide can be used.
Requirements
- Mimulus ringens flowers (with healthy anthers)
- 70% ethyl
- Alcohol, Farmer’s solution
- 0.4M sodium sulphite solution
- 1 molar sodium hydroxide
- 8 M NaOH, or a 10 M NaOH
- Aniline blue, aniline blue with fluorescent brightener or acetocarmine combined with acidified aniline blue (either stain can be used to stain the sample)
Procedure
- Using a pair of tweezers gently separate the pistils from the other parts of the flower
- Place the pistils in the fixing agent for about 36 hours (Farmer’s solution, Ethyl alcohol or Formalin-acetic acid-alcohol)
- Transfer the sample to 70 percent ethanol
- Transfer the sample to distilled for about 10 minutes and the place it in the softening solution (8 M NaOH or 10 M NaOH ) for about 10hours
- Remove the sample from softening solution and wash with distilled water (also remove ovary when washing)
- Stain the sample using either of the stains mentioned above,
- Decolorize using 0.1% aniline blue in potassium phosphate for about 2 hour in a dark room and mount with a drop of the decolorizer
- Place the cover slip on the slide and view the sample under the microscope
Observation
When viewed under the microscope, the tubes will be seen to look like fragile tubes (like flexible straws).
Electron Microscopy
For electron microscopy, acetolysis is one of the most popular methods used for preparing pollen. However, it has been shown to cause distortions, which influenced the development of a new and better method. One of the best and most recent methods involves the use of Aerosol-OT and amyl acetate.
* acetolysis involves the use of acetic acid for the purposes of breaking down compounds (organic compounds)
Requirements
- Aerosol-OT
- Flower sample
- Water
- Acetone
- Ethanol
- Amyl Acetate
- A scanning electron microscope (SEM)
- Pipettes
- 15 ml centrifuge tubes
Procedure
- Carefully remove the anthers from the flower and immerse them into 3 percent Aerosol-OT solution for softening
- Carefully remove the pollen from the anthers and place them into a 15 ml centrifuge tube
- Keep the pollen sample in Aerosol-OT solution for about 5 days for rehydration
- Using the pipette, drain out the Aerosol-OT solution from the tube and add water for about 10 minutes
- After 10 minutes, drain out the water and add the acetone/water mixture (1:1) for about an hour
- Lightly centrifuge the tube to concentrate the pollen grains
- Place the tube in an ultrasonic bath for a minute to sonicate the grains
- Drain out the mixture solution and replace with a fresh mixture and allow to stand for about 1 hour (This cleans out any extra material on the surface of the pollen grains)
- Replace the acetone/water mixture with distilled water and allow to stand for 10 minutes
- Remove the distilled water and add 50 percent ethanol and allow to stand for an hour
- Replace 50 percent ethanol with 70 percent ethanol for an hour
- For periods of 1 hour, replace the 70 percent ethanol with 90 percent ethanol and 100 percent ethanol (repeat 100 percent ethanol twice) for dehydration (for the second round with 100 percent ethanol, allow to stand for about 4 hours)
- Drain out the ethanol and add amyl acetate for about an hour (this is done to prepare for critical drying point)
- Remove the pollen grains from the tube and transfer them to a modified BEEM capsule
- Cover the ends of the cylinder and press the cylinder in to the cap
- Carefully remove amyl acetate so as to retain pollen
- Using a pipette, transfer the pollen grains into the basket
- Place the baskets in the critical point drier
- Remove the upper lid and invert the opened cylinder to mount the grains on studs
- To make the grains float down the surface of the stud, one may gently tap the basket
- Before viewing, the grains should be shadowed with gold
Observation
When viewed under the SEM, the grains can clearly be seen as inflated or deflated structures (of varying shapes) with rough surfaces or cleavages depending on the type of pollen being viewed.
When viewed under the microscope (compound microscopes or electron microscopes) the grains may have different types of ornamentations with the ornamentations being irregularly distributed on the surface of the grains.
For instance, whereas some of these ornamentation may be visible all across the surface of the grain, others may only be present on polar ends of the grain or across given sections on the surface of the grain.
Learn more about Microscope Slides and Preparation
Return to Microscope Experiments
Return from Pollen under the Microscope to MicroscopeMaster Home
Sources
Cameron Thompson (2016) Techniques for Viewing Pollen Tubes in Angiosperm Flowers.
Links
Find out how to advertise on MicroscopeMaster!
![Pollen By Inspiralia (Own work) [CC BY-SA 3.0 (https://creativecommons.org/licenses/by-sa/3.0)], via Wikimedia Commons Pollen By Inspiralia (Own work) [CC BY-SA 3.0 (https://creativecommons.org/licenses/by-sa/3.0)], via Wikimedia Commons](https://www.microscopemaster.com/images/Pollen_Microscopic.jpg)
![Pollen grains: Pine tree, 1200X By Doc. RNDr. Josef Reischig, CSc. (Author's archive) [CC BY-SA 3.0 (https://creativecommons.org/licenses/by-sa/3.0)], via Wikimedia Commons Pollen grains: Pine tree, 1200X By Doc. RNDr. Josef Reischig, CSc. (Author's archive) [CC BY-SA 3.0 (https://creativecommons.org/licenses/by-sa/3.0)], via Wikimedia Commons](https://www.microscopemaster.com/images/Pollen_grainsPollen_grains_of_common_hazel_Corylus_avellana_total_preparation.jpg)

![Scanning Electron Micrograph of Sage Pollen By Judyta Dulnik (Own work) [CC BY-SA 4.0 (https://creativecommons.org/licenses/by-sa/4.0)], via Wikimedia Commons Scanning Electron Micrograph of Sage Pollen By Judyta Dulnik (Own work) [CC BY-SA 4.0 (https://creativecommons.org/licenses/by-sa/4.0)], via Wikimedia Commons](https://www.microscopemaster.com/images/Sage_pollen.jpg)


