Microscope Slides Preparation
Styles and Techniques
Using Prepared Microscope Slides
Objects magnified under compound microscopes are mounted onto microscope slides. Made of glass or plastic, slides are approximately 1x3 inches and between 1mm-1.2 mm thick.
Multiple methods of preparation allow for advanced viewing of inorganic and organic objects.
Flat and Concave Styles
The most basic of all microscope slides is a flat rectangular piece of soda lime glass, borosilicate cover glass or plastic, with ground edges.
All corners are a sharp 90-degrees and, along with a rough outer edge, can cause minor finger cuts if not handled with care.
The top and/or bottom edges of a slide can be frosted, enabling easy marking for sample identification and/or orientation. The etched frosting keeps all pen marks safely away from the sample and a selection of frosted colors provides additional means of categorization.
Rounded safety corners to prevent accidental cuts as well as beveled edges with clipped corners ideal for blood samples are options available for both generic and frosted slides.
Concave microscope slides contain one or more surface depressions ideal for liquid solutions and larger specimens. These more expensive microscope slides can be used without a cover.
Some manufacturers produce plastic chambers with a predetermined number of slides with covers.
Filled calibrated wells or flasks are viewed quickly without preparing or clipping individual slides to the microscope stage, making this especially useful in sediment studies, such as urine analysis; in addition, some tray designs can be placed in an incubator or refrigerator, allowing for the study of cultured samples.
Additional Features
Some cells and tissues cannot adhere to a plain glass surface and require a positive charge or surface modifications.
Saving time and money, electrostatic charged slides are a popular choice for researchers of histology, cytology and pathology.
Surfaces treated with biological reagents can make a slide water-proof, resistant to certain chemicals and reduce instances of cross-contamination.
Additional variations to microscope slides include:
Etched grid system or graticule
- Enables researcher to monitor and communicate area(s) of interest
- Aids in hand sketching
- Helps geographical plotting
- Estimates size and scale
Dual concavity
- Side-by-side comparisons, including sample to control
- Reduces risk of cross-contamination
Transparent Mica
- Rarely used substitute for glass
- Less prone to dust, scratching
- Prevents glare
Cover Slips
Almost always made of borosilicate or silicate glass, cover slips hold samples in place and protect them from inadvertent movement and contamination.
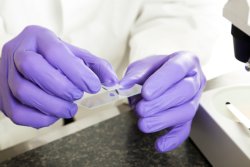
It also protects the microscope, preventing direct contact between the sample and lens as well as accidental leakage of water-based preparations.
The thin, transparent cover glass is usually square and available in types Number 1 and Number 2.
Suited for high-resolution microscopy and oil immersion preparations, Number 1 covers are .13-.17mm thick. Number 2 covers, .17-.25 mm, are designed for general purpose.
Less frequent characteristics include rectangular shapes, alternative materials such as quartz and certain types of plastic, etched lines or grids and additional thicknesses.
If not creating a permanent slide with glue and/or sealant, cover slips can be removed and sterilized for multiple reuses.
Preparation Techniques: Dry Mounts, Wet Mount, Squash, Staining
The main methods of placing samples onto microscope slides are wet mount, dry mount, smear, squash and staining.
Dry Mount:
The dry mount is the most basic technique: simply position a thinly sliced section on the center of the slide and place a cover slip over the sample.
Dry mounts are ideal for observing hair, feathers, airborne particles such as pollens and dust as well as dead matter such as insect and aphid legs or antennae. Opaque specimens require very fine slices for adequate illumination.
Since they are used for primarily inorganic and dead matter, dry mounts can theoretically last indefinitely.
Wet Mount:
Used for aquatic samples, living organisms and natural observations, wet mounts suspend specimens in fluids such as water, brine, glycerin and immersion oil. A wet mount requires a liquid, tweezers, pipette and paper towels.
To prepare the slide:
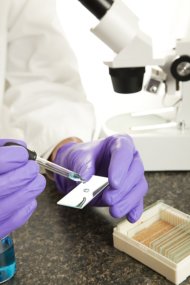
- Place a drop of fluid in the center of the slide
- Position sample on liquid, using tweezers
- At an angle, place one side of the cover slip against the slide making contact with outer edge of the liquid drop
- Lower the cover slowly, avoiding air bubbles
- Remove excess water with the paper towel
Although wet mounts can be used to prepare a significantly wide range of microscope slides, they provide a transitory window as the liquid will dehydrate and living specimens will die.
Organisms such as protozoa may only live 30 minutes under a wet mount slide; applying petroleum jelly to the outer edges of the cover slip creates a seal that may extend the life of the slide up to a few days.
In addition, larger protozoan such as paramecium may be too large and/or move too quickly under the wet mount.
In these circumstances, adding ground pieces of cover glass to the water before the slip layer will create added space and chemicals or strands of cotton can be added to slow the movement of paramecium, amoeba and ciliates.
Smear Slides:
Smear slides require two or more flat, plain slides, cover slips, pipette and tissue paper:
- Pipe a liquid sample such as blood or slime onto a slide
- Using the edge of the second slide, slowly smear the sample creating a thin, even coating
- Put a cover slip over the sample, careful not to trap air bubbles
- Remove excess liquid
Ideally, smears should dry naturally in an environment of moderate, steady temperature.
The angle of the smearing slide determines the length of the smear; a steeper angle creates a shorter smear. For samples such as blood, begin by backing the smearing slide into the sample and then push across the slide, pulling the blood in the opposite direction to create a smooth layer.
A thicker slide can be created with two drops, but only with the blood of mammals as the erythrocytes lack a nucleus allowing cells to be amassed in multiple layers.
Read further about Blood Smears - process and technique, possible presence of artifacts
Squash Slides:
Designed for soft samples, squash slides begin by preparing a wet mount; place lens tissue over the cover glass; gently press down, careful not to destroy the sample or break the cover glass, and squash the sample; remove excess water.
Staining:
A variety of methods exist for staining microscope slides, including non-vital or in vitro stains of non-living cells and vital or in vivo stains of living tissue. Staining provides contrast through color that reveals structural details undetected in other slide preparations.
Staining solutions such as iodine, methylene blue and crystal violet can be added to wet or dry mounts.
A simple staining method:
- Add a drop of staining solution on the edge of one side of the cover slip
- Position the edge of a paper towel on the opposite end
- Allow dye to be pulled across the specimen
Stains are especially useful in the fields of histology, virology and pathology, allowing researchers to study and diagnose diseases, identify gram positive and negative bacteria as well as examine detailed attributes of a variety of cells.
See different staining types and preparation techniques for more information.
Prepared Slides
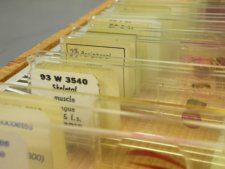
Especially useful for educational purposes and for those who do not want to undertake the laborious process of creating slides, prepared microscope slides are available in all areas of science, including:
Biology
- Plants
- Animals
- Single-cell organisms
Human Anatomy
- Organ samples
- Tissues
- Blood
- Epithelium cells
Botany
- Monocot and Dicot Tissues
Zoology
- Samples from various animal species
Marine-biology
- Bacteria
- Algae
- Coral
- Fish and Crustaceans
Pathology
Prepared microscope slides also offer access to bacteria, animal tissue, marine life, diseased cells and other specimens that may not be easily available to students or hobbyists.
In addition, they can be used as controls for students and researchers to compare collected samples.
Prepared slides can be purchased in sets and are almost always permanent, providing indefinite reuse.
Whether you mount samples, pipette into wells or use prepared slides, microscope slides offer a vehicle to contain a specimen while observing under magnification.
Illuminated on the stage of a compound light microscope, an amazing new view into the world can be seen with the simple act of placing a sample on a glass slide.
Read about the benefits of owning a set of histology slides. You may decide to purchase ASAP for your lab, school or for home study.
And be sure to follow our link if you are in need of good sketching techniques when viewing microscope slides.
Return to Prepared Microscope Slides
Return from Microscope Slides to Best Microscope Home
Find out how to advertise on MicroscopeMaster!


