Paper under a Microscope
Procedures, Observations and Discussion
Background
When looking at paper under a microscope, it's a straightforward experiment. Essentially, paper consists of a network of plant fibers that have been laid down to form a flat sheet. Different types of trees (e.g. hemlock, larch, fir, etc) among other components are used for paper production with the quantity of these components varying depending on the type of paper and intended use.
Since the invention of the microscope, various microscope techniques have been used to study the organic and inorganic micro-objects associated with cellulose fibers of books and documents as well as dirt, inks and other objects that have accumulated in these books and documents over the years.
This has allowed researchers and scholars to not only discover important information contained in these papers, but also the processes used in their manufacture, what caused them to age as well as where they had been depending on the other micro-objects identified.
According to an article that was published in the Heritage Science Journal in 2019, many ancient documents have been discovered in the last few decades. Through archaeological studies, these documents have been a valuable source of information regarding the time period in which they were made. By using microscopic techniques and other tools, it has been possible to distinguish the main components of these papers.
Whereas some of the documents consist of paper, others are made of parchment while others consist of both paper and parchment. Through a careful investigation of these materials and other components identified (e.g. fabrics, wood, etc), researchers have been able to detail the manufacturing process, the history as well as the manner in which they were conserved.
In criminology, on the other hand, the use of various microscopic techniques has been very useful in the analysis and investigation of papers and other elements of documents associated with given legal cases. As David Black explains, using a microscope in examining questioned documents allows for the discovery of facts as well as the demonstration of these facts. This is because microscopy makes it possible to identify and expose physical evidence on documents that would otherwise remain invisible to the naked eye.
Of interest: Forensic Pathology.
For the examination of various documents, the stereoscopic microscope is preferred for several reasons.
These include:
· Makes it easier to observe ridges, furrows and other tiny indentations that would otherwise be difficult to see with an ordinary microscope
· Ease of use
· Provides a wide area of view
· Makes it possible to view the image in the erect and upright positions (true position)
· Long working distance (between the stage and objective) thus allowing for larger specimen to be observed
· Using the microscope requires little preparation of the specimen/sample under investigation
* Some of the other microscopes used to observe paper in archaeology include:
- Scanning electron microscope
- Raman microscope
- Combination of optical microscopy and ATR-FTIR spectroscopy
Paper under a Microscope
Objectives
This experiment is aimed at investigating/studying different types of paper under the microscope.
By the end of this activity, you should be able to:
- Operate a microscope
- Identify the structure of paper under a microscope
Requirements
- Paper samples - You can find different types of paper for the experiment (e.g. tissue paper, printing paper, cardboard, newspaper, etc) for comparison
- Microscope: A stereo and compound microscope
- Pen
* Mark/label each type of paper so that you remember how each type of paper appears under the microscope.
Procedure
Using your hands, tear off a small piece of paper from each sample in such a manner that the torn edges are thinner for microscope - This allows the fibers to be exposed for better observation.
You can place each torn paper in separate (marked/labeled) Petri dishes so that you keep a record of each paper you observed. Otherwise, label/mark each sample after observing under the microscope.
For a stereo microscope, the sample can be placed directly on the stage for observation.
Follow the following steps:
· With the microscope on a sturdy surface, switch on the light source (top lighting) - top lighting is normally used for solid specimen
· When using a compound microscope, make sure to lower the stage using the stage adjustment knob
· Place and center the specimen on the stage so that the torn edge will be visible under the microscope - To prevent the paper from curling up, you can hold it in place using the stage clips
· When using the compound microscope, you can place the piece of paper on a glass slide
· Before making an observation, rotate the turret in order to set the low objective lens in place - You should start observing the sample using low magnification first
· While looking through the eyepiece, gently turn the focus knob until the image comes into focus
· Observe the torn edges and record your observation
· Switch to high magnification and again record your observation
* Using the pen or a marker, you can make a dot on the paper and observe how the ink looks on the paper.
Observation
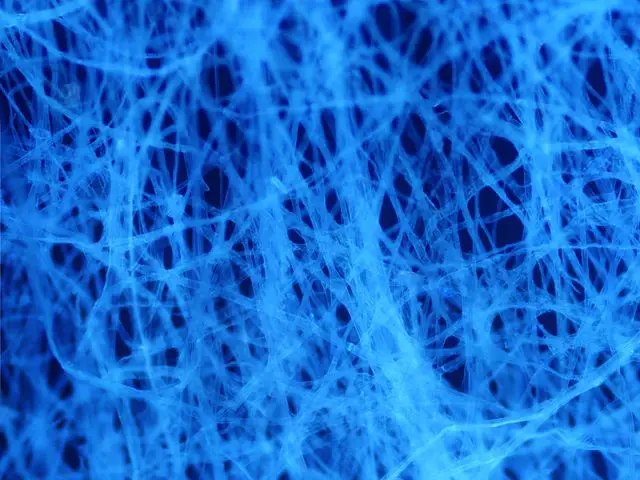
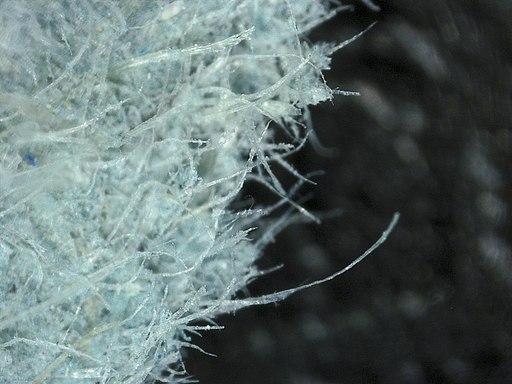
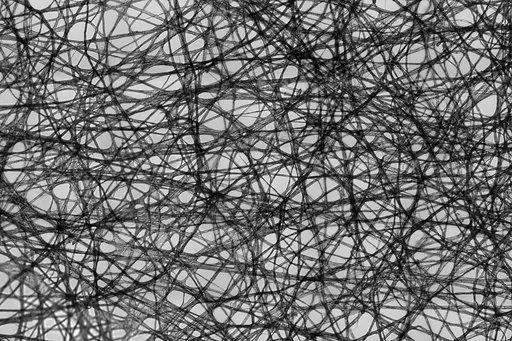
When the paper sample is viewed under the microscope (at low magnification) the fibers will have a thread-like appearance and may look like cotton (when cotton is observed with the naked-eye). However, by switching to a higher magnification, the fibers should become more clear.
As compared to the image seen when using a stereo microscope, a compound microscope (as 100 or 200 times magnification) gives a much clearer image of the fibers. Here, it's possible to identify individual fibers.
* Depending on the paper, fibers may look different compared to the images above.
Discussion: A Brief History of Components used to make Paper
In ancient Egypt, a product similar to paper was made using stalks of the papyrus plant. This process involved cutting/slicing the triangular stems (lengthwise) into thin boards that would then be pasted together and dried. This allows Egyptians at the time to produce material for documentation purposes. However, this was not paper as we know it today.
The history of paper can be traced back to the Han Dynasty (105 AD). To make the paper, Ts'ai Lun, the Chinese Eunuch who invented it used mulberry fibers (using mulberry tree bark).
To make the paper, Ts'ai first made pulp using bamboo fiber as well as the inner bark of mulberry tree. a small amount of the slurry was then lifted using a sieve made of silk. In order to evenly spread the fibers, the sieve was gently shaken also allowing water to be drained off. These fibers were then allowed to settle into a sheet that was finally dried in the sun.
This process made it possible to produce a high quality paper that could last for a long time. Apart from the inner bark of mulberry tree, Ts'ai also experimented with a number of other trees as well as pieces of hemp and fishnets, etc.
* Here, it's worth noting that some archaeological research has discovered paper preceding those made by Ts'ai Lun. However, he is often credited as having made the first paper because his process is well documented.
Over time, the technique spread to other parts of Asia as the technology continued to be improved. For instance, paper mills that made the process more efficient were developed in the Islamic world in the 8th Century.
In later Centuries, the technique found its way to Europe where the technology saw further advancements. In the 19th Century, for instance, such machines as the London’s Fourdrinier machine made it possible to produce long sheets of paper that would then be cut into smaller pieces depending on use.
Today, most papers are made using wood pulp. Here, cellulose fibers are first extracted from various trees and converted to pulp. This pulp is then combined with water before being added into the papermaking machine.
Apart from trees, cotton and other natural fibers are used for the production of documents that are likely to be archived. These fibers are ideal for such papers because they have strong fiber that can last for a long time.
Conclusion
As mentioned in the discussion, cellulose fiber is one of the main components used to make paper. Therefore, apart from comparing how different types of paper look under a microscope (newspaper, tissue paper, and Kraft paper, etc), you can also observe cellulose pulp under the microscope and compare the image obtained with those of different types of paper. This will allow you to compare the material used to make paper and the final product and see how they compare.
You can use a more powerful microscope (e.g. scanning electron microscope) to obtain a detailed image of these fibers for comparison with the images of the optical microscope.
Return to Beginner Microscope Experiments main page
Return to "What looks cool under a Microscope?"
Return from Paper under a Microscope to MicroscopeMaster home
References
Agnieszka Helman-Ważny. (2016). More than meets the eye: Fibre and Paper Analysis of the Chinese Manuscripts from the Silk Roads.
Josep Asunción. (2003). The Complete Book of Papermaking.
Marina Bicchieri, Paola Biocca, Piero Colaizzi & Flavia Pinzari. (2019). Microscopic observations of paper and parchment: the archaeology of small objects.
Links
https://heritagesciencejournal.springeropen.com/articles/10.1186/s40494-019-0291-9
Find out how to advertise on MicroscopeMaster!
