Dirt and Soil under a Microscope
Procedure and Observation
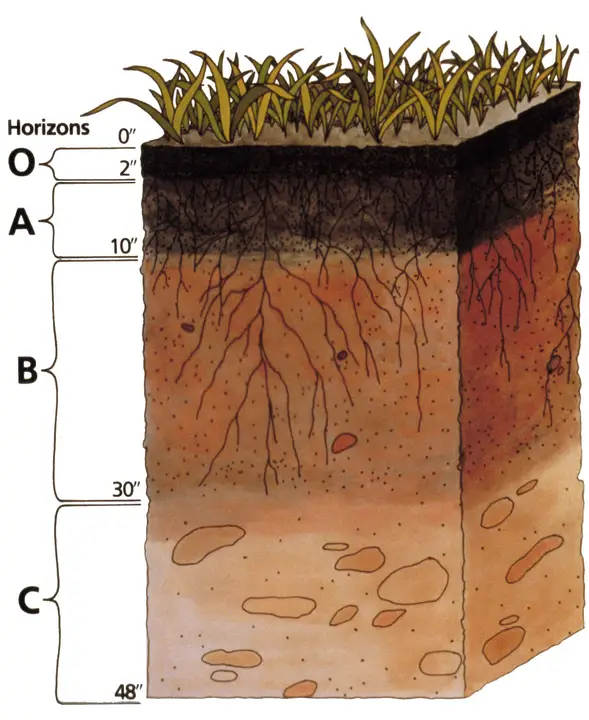
The terms "dirt" and "soil" are often interchanged to mean the same thing. However, this is not necessarily the case given that components between the two vary making one preferable for agriculture as compared to the other. As compared to soil, dirt is a fine-grained unconsolidated mixture that's found on the ground.
For the most part, it consists of sand, silt, and clay (and may also contain rocky fragments) but lacks the organic and living material found in soil. Unless you have been to a garden or farm, you can easily obtain dirt that has accumulated under your shoes or even under your fingernails.
* One of the best ways to compare dirt and soil (apart from the general coloration) is to scoop a small amount of each with your hand. Whereas soil forms loose balls of clump together even without adding water, dirt does not compact even when water is added.
* Dirt should also not be confused for sediments which are granular material that has been eroded by such forces as wind and water.
Overview
While soil and dirt are not necessarily the same thing, they are related in many ways. Along with other granular material or particles (sand, silt, dust, chalk, etc) found on earth, have been the subject of studies in many fields.
In earth science and archaeology, the study of soil structures and geographical structures have made it possible to discover more information regarding the history of earth. In agriculture, the analysis of various soil samples allows researchers to differentiate between different types of soil and determine the best composition for farming purposes etc. These activities are also evident in other fields including the construction and mining industries.
Regardless of the industry, microscopy has been one of the most valuable tools for studying the characteristics of different types of soil and its components. Being a pioneer in microscopy, Antonie van Leeuwenhoek can be argued to have been the first person to study the appearance of soil (in addition to many other materials) under the microscope in the 1670s. After looking at particles of soil and chalk under the microscope, Leeuwenhoek described them as being composed of globules.
In the early 1930s, however, major investigations of soil using microscopic techniques were by Harrison in 1933 and Walter Kubiena in 1938. The two are credited for independently applying the concept of microscopic techniques in soil science. Their work, based on which other techniques were later developed, made it possible to determine the micromorphology of soil in great detail.
* Micromorphology involves the use of microscopic techniques to study the components of soil material.
Today, advanced microscopic techniques continue to be used to characterize different types of soil as well as their components in different environments. This has also allowed for the classification of material based on their respective components.
Objectives
For this experiment, the aim is to use several microscope techniques to observe dirt under a microscope. Moreover, the sample of soil will also be viewed under the microscope for comparison.
By the end of this activity, you should be able to:
- Operate a stereo microscope and a compound microscope
- Identify components found in garden soil and those found in dirt
- Know how to prepare a thin section of dirt for microscopy
Direct Observation of the Samples
Requirements
- Stereo and compound microscope
- Sample of garden soil and a sample of dirt
- Few Petri dishes
- Several microscope glass slides
- Water
- Pair of gloves
- Spatula
- Pipette/drop
Procedure
· In dealing with soil and dirt, you can use a pair of gloves
· Using a spatula, scoop and place a small amount of dirt onto a Petri dish - Repeat this step with a small amount of soil into another clean Petri dish
· Using a dropper or pipette, place a few drops of water onto the samples in each Petri dish and allow the soil and dirt samples to distribute evenly in the water
* Water is not essential and the sample can be directly observed without adding a few drops of water. However, if the water is not added, avoid observing the soil and dirt samples as clumps, but rather try to spread it a little for better inspection.
Microscopy
Stereo Microscope
· When using the stereo microscope, first turn the turret in order to set the low power objective in place
· Place the Petri dish with dirt on the stage and try to center it under the low power objective
· While looking through the eyepieces, gently turn the coarse and fine adjustment knobs to bring the image into focus
· Observe the samples and then switch to high magnification
· Repeat this for the two Petri dishes and compare your observations
Compound Microscope
· When using a compound microscope, the samples should be prepared on clean glass slides rather than the Petri dishes
· Having placed a small amount of each sample on clean microscope glass slides, lower the microscope stage before mounting the slide
· Turn the turret to set the low power objective in place
· Place the slide on the microscope stage and try to center it under the objective
· While looking through the eyepieces, gently turn coarse and fine adjustment knobs to bring the image into focus
· Observe the samples and then lower the stage before switching to high power objective
· Observe the slides and record your findings
* In preparation of the soil and dirt samples, you can first mix the samples with water in separate vials and then place a sample of each on the slides/Petri dishes for observation.
Preparing a Thin Section
Requirements
- Dirt sample
- Polyester resin or Epoxy resin
- Vacuum pump
- Clean class slide
- Clean coverslip
- Diamond saw
- Grinding wheel
Procedure
· Air dry or freeze dry the sample of dirt in order to remove water - Resins used to fix the samples are hydrophobic. For this reason, water has to be removed before starting the fixation process. Air drying is particularly preferred given that it will not affect the dirt composition (or garden soil composition if you prepare a sample of each).
· Place the sample (a small amount) in a small glass or plastic container and add gently add the resin - If you are using unsaturated polyester resin, you can mix it with acetone in order to reduce its viscosity. You can also use Epoxy resin or Canadian balsam (This step should be conducted at vacuum (using a vacuum pump) so that the sample is well penetrated)
· Allow the resin to harden - This may be achieved by placing the sample in an oven at about 40°C
· Once the resin has dried, carefully cut using a diamond saw in order to obtain a flat surface
· Polish the cut surface in order to ensure that you have a very smooth surface
· Using an isotropic cementing agent (colorless) such as the polyester resin, glue the polished surface onto a clean glass slide
· Allow the sample to properly attach onto the slide and then cut again using the diamond saw so that you have a very thin slide - Here, it's important to take care when cutting the sample in order to get the thinnest slice possible
· Using a grinding wheel with fine abrasive, carefully grind the slice in order to further trim the slice and make it very thin (You can try and trim the slice down to about 30 microns)
· Clean the polished surface and cover with a clean coverslip - Here, you can place a drop of the resin on the thin slice and gently place the coverslip on top
* If you have enough time, you can try and repeat the process with a sample of garden soil for comparison.
Petrographic Microscope
Procedure
· With the microscope stage lowered, first turn the rotating turret to set the low power objective in place
· Place the slide on the microscope stage and try to center it - So that the sample is directly below the objective
· While looking through the microscope eyepiece, gently turn the coarse and adjustment fine adjustment knobs to bring the image into focus
· As you observe the sample, you can gradually rotate the stage to observe different parts of the specimen
· Record your observation and switch to high objective power
· Record your observations
Observations
When the dirt in a Petri dish is viewed under the stereo microscope, it will be possible to identify large rock fragments and sand grains at 40X magnification. However, it will not be possible to differentiate grains/particles of silt and clay in the sample. For this reason, they will mostly appear as a matrix in which the large grains of sand and rock fragments are embedded.
At 40X magnification, it might be possible to notice movements in the garden sample. In addition, you may also identify a few grains of sand, minerals, and other organic matter. The movement in the sample indicates the presence of tiny organisms such as nematodes.
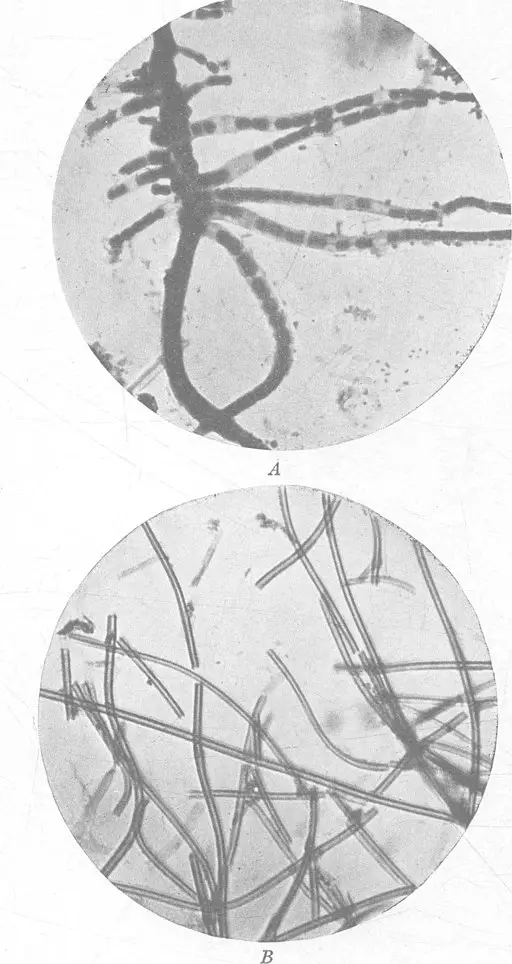
Under the compound microscope, the nematodes (which keep wriggling as they move about) can be easily identified. At about 100X, it will also be possible to identify fungal hyphae that are elongated in the field of view. Bacteria can also be identified in clusters. While you may notice some living organisms in the dirt sample, there would be very few compared to the garden soil which is rich in tiny living organisms.
Under the Petrographic microscope, the different components of dirt will be easy to distinguish. Here, sand grains may appear white in color while the clay matrix would appear brownish in color. As compared to the sand granules, any rock fragments in the sample can be distinguished based on size and color.
As compared to the sand grains, these fragments may be larger in size with different colors ranging from brown to dark brown, etc. Here, the large granules of sand and rock fragments occupy spaces between the thin matrix consisting of clay silt and very fine rock fragments.
Discussion and Conclusion
As compared to dirt, soil has been described as being alive. This is because it contains various organic matter (of plants and dead and decaying organisms) as well as live organisms such as nematodes. These constituents make a complex soil material that is able to support the growth of plants.
Dirt, on the other hand, lacks many of these components and largely consists of silt, clay, sand, and rock fragments in some cases. As such, it's unable to retain water or support the growth of plants. These differences can be easily identified under the microscope.
While the activities outlined in this article entail the use of several microscope techniques to identify and compare the components of garden soil and dirt, students can also use the steps outlined above to prepare and study the structure of silt, clay, dust, and humus to determine how they compare.
These activities will allow students to easily identify the various structures of different earth components and thus get a better understanding of the different uses of these materials in agriculture and construction among other processes (e.g. production of cement etc).
Return to Beginner Microscope Experiments
Return to "What looks Cool under a Microscope?"
Return from Dirt under a Microscope to MicroscopeMaster home
References
D. Bardell. (1982). The Roles of the Sense of Taste and Clean Teeth in the
E. A. FitzPatrick. Soil Microscopy And Micromorphology. Discovery of Bacteria by Antoni van Leeuwenhoek.
JoVE Science Education Database. (2020). Environmental Microbiology. Visualizing Soil Microorganisms via the Contact Slide Assay and Microscopy. JoVE, Cambridge, MA.
Shabbir A. Shahid, Mahmoud A. Abdelfattah, and Faisal K. Taha. (2013). Developments in Soil Salinity Assessment and Reclamation.
Links
https://makezine.com/laboratory-55-examine-the-microscop/
http://soils.usda.gov/education/
Find out how to advertise on MicroscopeMaster!
